
Spring pool opening safety
Uncovering the pool for the 2026 season requires more than a quick glance. The CDC updated their recreational water guidelines recently, and following them is the only way to keep swimmers safe from avoidable accidents.
We're seeing a shift towards more proactive safety measures, emphasizing prevention rather than reaction. Regulations are evolving to address risks more comprehensively. Don't fall into the trap of thinking a quick skim and a chemical adjustment are enough. A comprehensive inspection is the foundation of a safe and enjoyable swimming season.
I’ve noticed many pool owners are tempted to skip steps, eager to get the season started. However, taking the time to perform a detailed inspection now can save you significant headaches—and potential harm—later. It’s a small investment of time that yields enormous peace of mind. A professional pool inspection can provide an unbiased assessment and identify issues you might miss.

Water chemistry levels for 2026
Chlorine alone won't keep a pool safe. You need to balance pH to ensure the chlorine actually works, while maintaining alkalinity to prevent those levels from swinging wildly. If these are off, the water can irritate skin or slowly eat away at the pool liner.
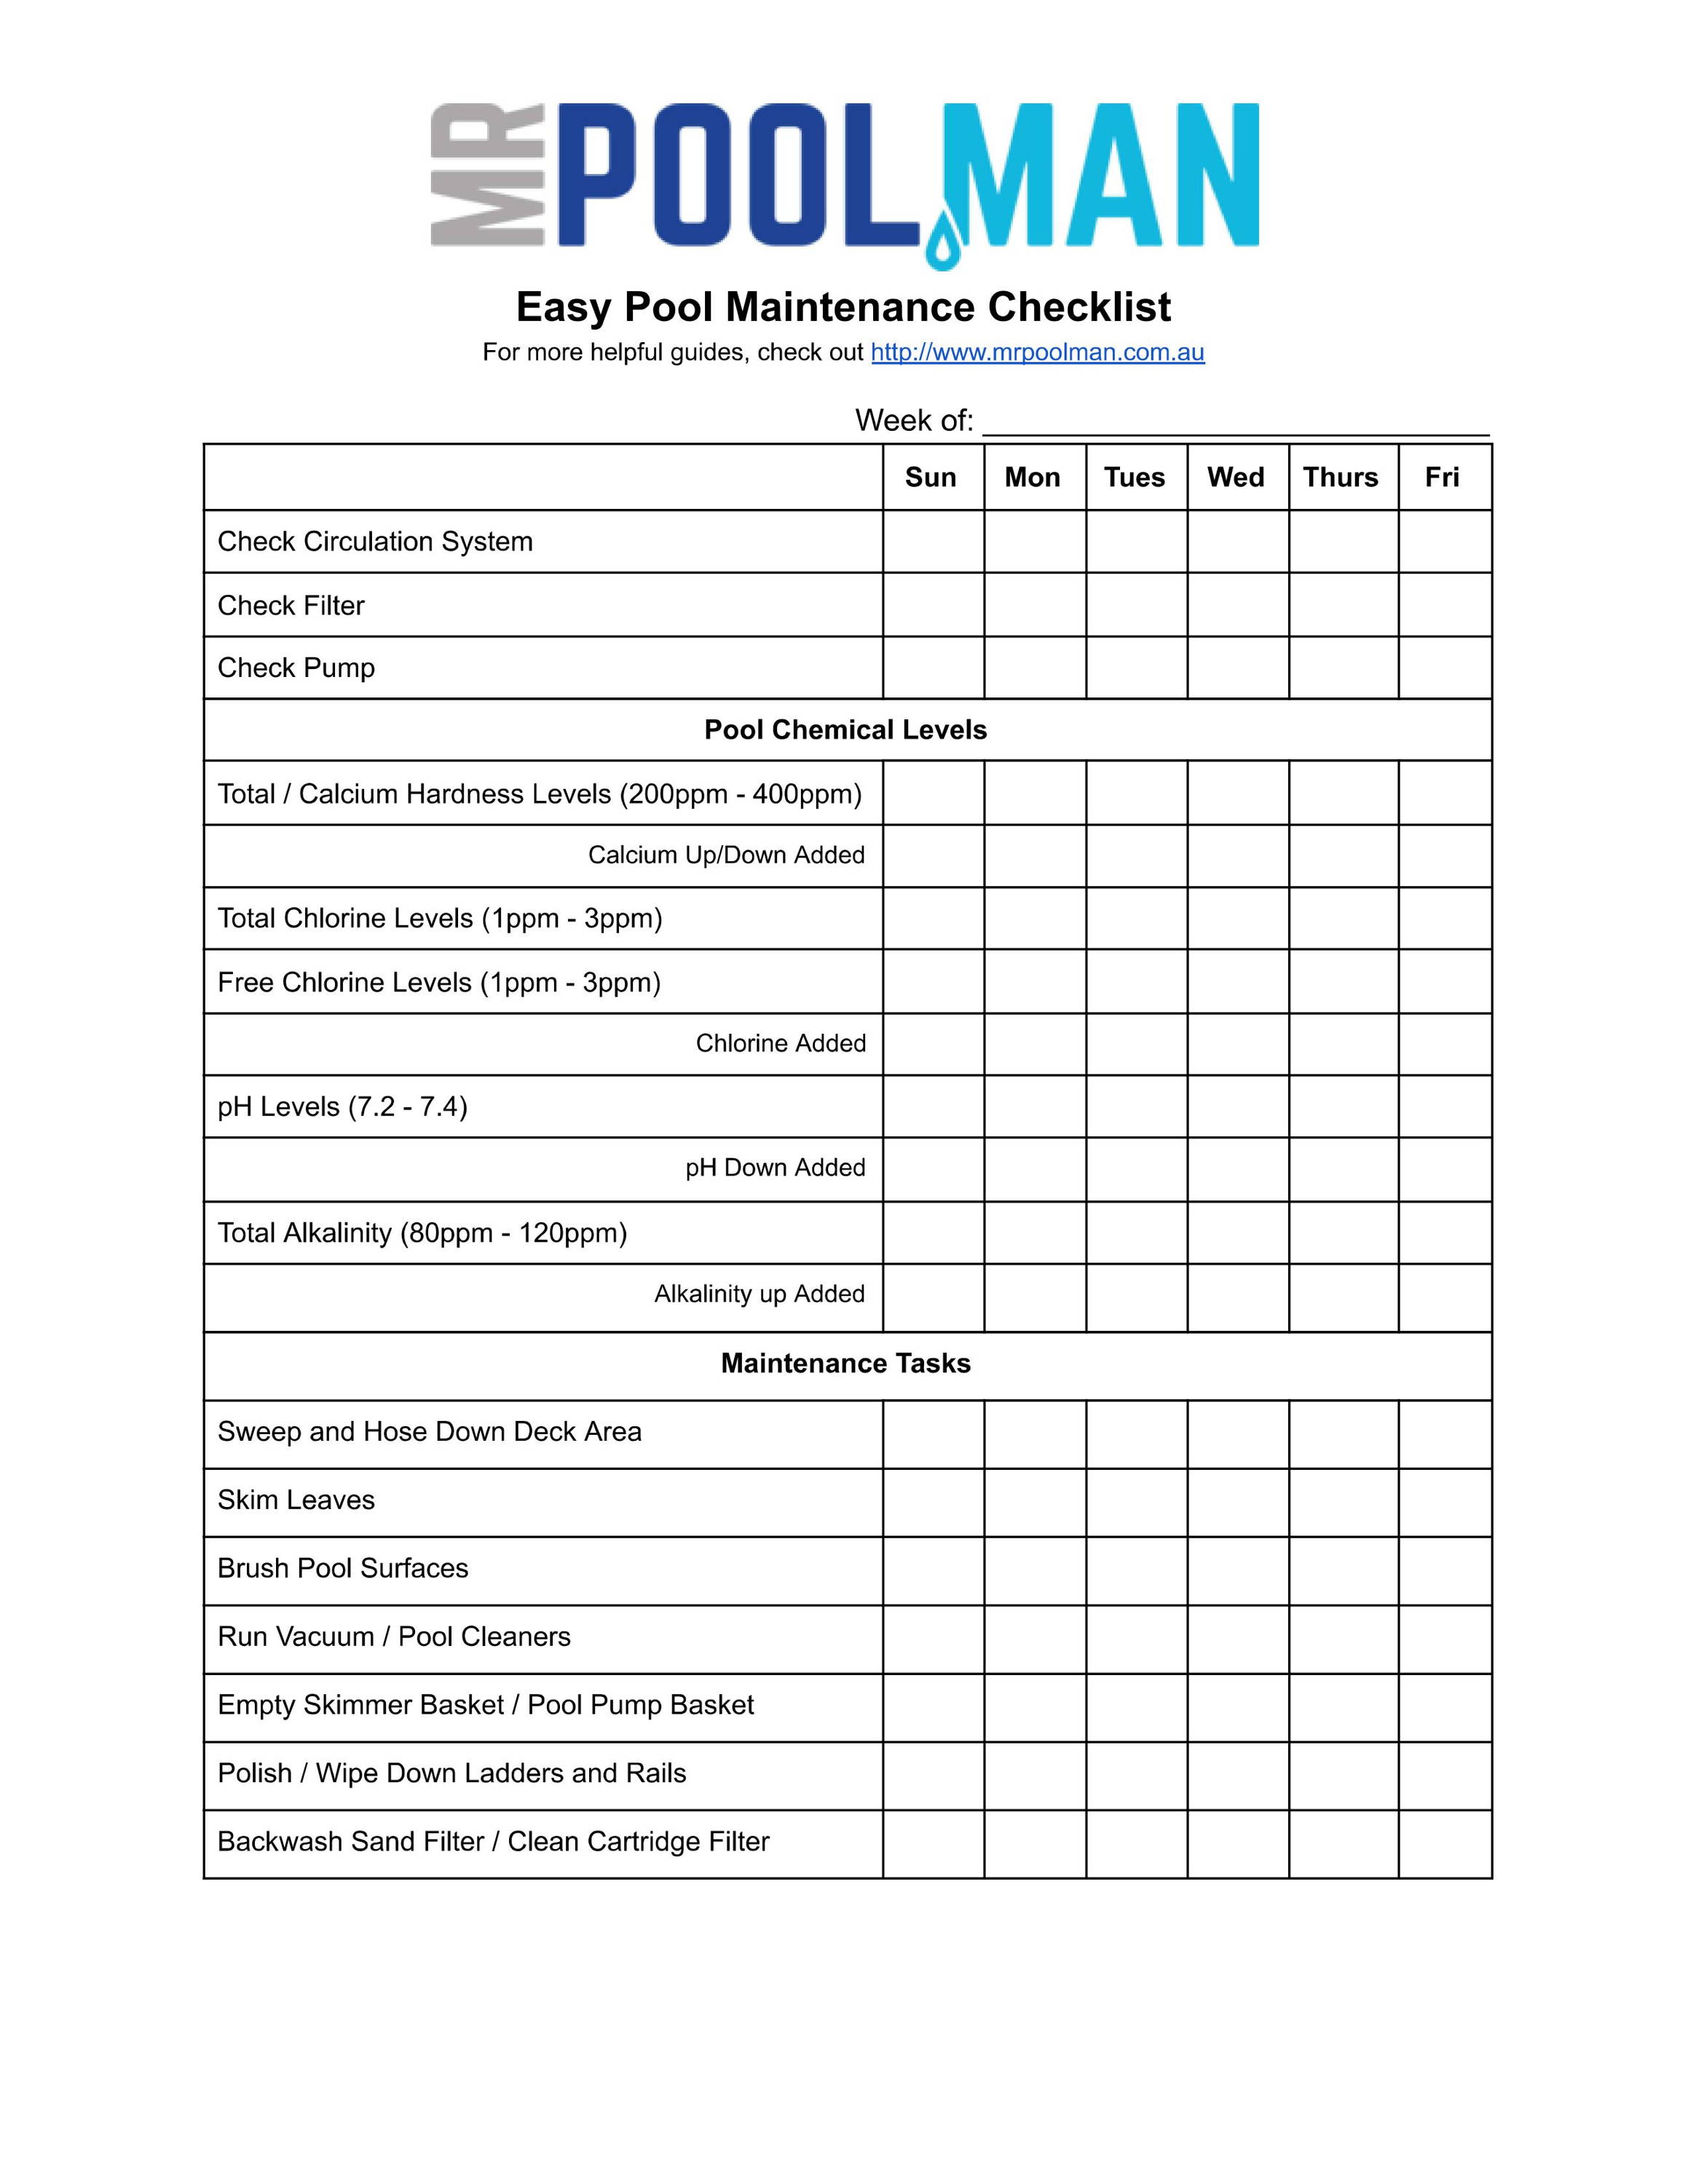
Here’s a breakdown of key tests and 2026 acceptable ranges based on CDC recommendations: pH (7.2-7.8), Total Alkalinity (80-120 ppm), Calcium Hardness (200-400 ppm), Cyanuric Acid (30-50 ppm), Free Chlorine (1-3 ppm) or Bromine (3-5 ppm), and Phosphates (below 125 ppb). Consistent monitoring is key, not just a one-time check during opening. Regular testing—at least twice a week—is a good practice.
Rainwater and debris significantly impact water balance. Rain introduces contaminants and dilutes chemical levels. Leaves, dirt, and organic matter consume chlorine and contribute to algae growth. After a heavy rain or a period of high debris, retest your water immediately and adjust accordingly. Don't assume your levels are stable; verify them.
Checking the deck, tile, and shell
A visual inspection of the pool’s structure is crucial. Start with the shell itself, looking for cracks. Hairline cracks are often cosmetic and caused by settling, but larger cracks—especially those that are widening or accompanied by bulging—could indicate a more serious structural issue. Pay close attention to areas around steps, lights, and fittings.
Next, examine the tiles. Loose or missing tiles aren't just unsightly; they can create sharp edges and indicate underlying problems with the pool's surface. Check the coping stones around the pool’s edge for cracks, chips, or instability. These stones provide a safe transition between the pool and the deck.
It can be tough to differentiate between cosmetic and structural cracks. A good rule of thumb is if a crack is wider than 1/8 inch, or if it’s actively growing, consult a professional. An engineer specializing in pool structures can provide a definitive assessment. While
- Check the pool shell for cracks wider than 1/8 inch.
- Look for loose or missing tiles that create sharp edges.
- Examine the Coping Stones: Ensure they are stable and free of cracks.
Equipment Check: Pumps, Filters, and Heaters
Your pool’s equipment is the heart of the system, and a thorough check is essential. Start with the pump. Inspect for leaks around the pump housing, seals, and connections. Listen for unusual noises during operation, which could indicate a failing motor or impeller. Ensure the pump basket is clean and free of debris.
Next, turn to the filter. Check the pressure gauge reading—a significantly higher-than-normal reading indicates a dirty filter needing backwashing or cleaning. Perform a backwash if needed, following the manufacturer’s instructions. Inspect the filter media (sand, DE, or cartridge) for wear and tear; media should be replaced periodically.
Heaters require special attention. For gas heaters, check for gas leaks and ensure proper ventilation. For electric heaters and heat pumps, verify proper grounding and inspect the electrical connections. Regularly scheduled professional maintenance—at least annually—is crucial for all pool equipment. Don't neglect the automatic cleaner, ensuring it’s functioning correctly and the hoses are free of cracks.
Proper grounding is non-negotiable. All electrical components should be properly grounded to prevent electrical shock. If you’re unsure about the grounding, consult a qualified electrician. Ignoring electrical safety can have devastating consequences.
Safety Barriers: Fences, Alarms, and Covers
Safety barriers are the first line of defense against accidental drowning. Current regulations, and those anticipated for 2026, are increasingly stringent. Fences should be at least 4 feet high, completely isolate the pool area, and have self-closing, self-latching gates that open outward away from the pool.
Pool alarms offer an additional layer of protection. There are several types available: surface wave alarms, submersible alarms, and wristband alarms. Each has its strengths and weaknesses, and effectiveness varies depending on installation and usage. A surface wave alarm detects disturbances in the water, while a submersible alarm detects underwater movement.
Safety covers—both manual and automatic—can prevent access to the pool when not in use. Automatic covers are generally considered the most effective, but they require professional installation and maintenance. The CDC emphasizes the importance of layered protection, combining multiple safety barriers for maximum effectiveness. Relying on a single barrier is never enough.
Pool Safety Barrier Comparison
| Barrier Type | Pros | Cons | Typical Installation Considerations | Overall Effectiveness |
|---|---|---|---|---|
| Fence | Provides a physical barrier, generally considered a primary safety measure. Offers consistent protection when properly maintained. | Requires consistent maintenance to ensure gate functionality and prevent gaps. Can impact the aesthetic of the pool area. | Must meet local building codes regarding height, gate self-closing/latching mechanisms, and spacing between vertical members. | High |
| Pool Alarm | Adds a layer of protection, alerting to unauthorized entry. Can be used in conjunction with other barriers. Several types available (surface, submersible, wristband). | Relies on proper functioning and user awareness. Potential for false alarms. May not detect very young children or pets. | Placement varies depending on alarm type. Requires regular battery checks and testing. Consider the alarm's range and sensitivity. | Medium |
| Automatic Pool Cover | Offers a robust physical barrier and helps with pool cleanliness. Can contribute to heat retention and reduce water evaporation. | Significant upfront cost. Requires professional installation and regular maintenance of the mechanical components. Can be slower to operate than other options. | Requires professional installation to ensure proper fit and operation. Electrical connections must be inspected regularly. Consider the cover’s weight capacity. | High |
| Safety Cover (Manual) | Provides a physical barrier when the pool is not in use. More affordable than automatic covers. Helps keep debris out of the pool. | Requires manual operation, which may discourage consistent use. Can be difficult for some individuals to manage. | Proper anchoring is crucial for safety. Requires adequate storage space when not in use. Regular inspection for wear and tear is essential. | Medium |
| Door/Window Alarms (leading to pool area) | Provides an additional layer of security, especially for homes with direct access to the pool area from the house. | Can be easily disabled or forgotten. Relies on consistent use and awareness. | Placement on all doors and windows leading to the pool area. Regular battery checks are necessary. | Medium |
Qualitative comparison based on the article research brief. Confirm current product details in the official docs before making implementation choices.
Drain safety and suction risks
Drain safety is paramount. Suction entrapment—where a swimmer gets stuck against a drain cover—can be deadly. The Virginia Graeme Baker Pool and Spa Safety Act (VGB) mandates the use of compliant drain covers designed to prevent entrapment. It’s not enough to simply have a compliant cover; it must be properly installed and maintained.
Visually inspect drain covers for cracks, breaks, or missing screws. Ensure the cover lies flush with the pool surface and that it’s the correct type for your pool. If you notice any damage or have concerns about the drain cover, do not use the pool and contact a qualified pool professional immediately.
Suction entrapment is a lethal risk. Check the screws on your drain covers every month. If a cover is loose or cracked, keep everyone out of the water until it is replaced.
Lighting and Electrical: Hidden Hazards
Underwater lighting and all electrical components around the pool pose significant hazards. Ensure all underwater lights are properly grounded and sealed to prevent water intrusion. Inspect wiring for damage, corrosion, or exposed connections. Any damaged wiring should be repaired or replaced immediately.
All electrical outlets near the pool should be GFCI (Ground Fault Circuit Interrupter) protected. Test the GFCI outlets regularly to ensure they are functioning correctly. Never use extension cords near the pool. If you suspect any electrical issues, do not attempt to fix them yourself.
Always hire a qualified electrician for any electrical repairs or installations around the pool. DIY electrical work can be extremely dangerous and is not worth the risk. Proper grounding and GFCI protection are essential for preventing electrical shock.

No comments yet. Be the first to share your thoughts!