
Start with the water surface
Before checking equipment or tiles, look at the water itself. The surface tells you immediately if the pool’s chemistry is balanced or if a hidden leak is draining the system. Clear, calm water is the baseline; anything else signals a specific problem.
Check for clarity and color
Healthy pool water should be clear enough to see the bottom drain. If the water looks cloudy or green, it indicates an algae bloom or high levels of suspended solids. This usually means the sanitizer levels have dropped too low to keep microbes in check.
If the water has a blue tint but feels slippery, the pH might be off. A pH that is too low can etch the plaster, while high pH makes chlorine less effective. Test the water with a strip or digital meter to confirm the exact balance before adding chemicals.
Look for surface debris and oil
Floating leaves, dirt, or insects are normal after a storm, but they should be skimmed off quickly. If you see a rainbow sheen or oily film on the water, it points to body oils, sunscreen, or lotions entering the pool. This film traps chlorine and prevents it from sanitizing effectively.
Use a skimmer net to remove debris. For oil films, a shock treatment followed by brushing the walls can help break down the residue. Regular skimming prevents organic matter from decomposing and clouding the water.
Watch for unusual bubbles
Aeration from jets or water features is normal, but bubbles that persist after turning off the equipment can signal a problem. If bubbles are coming from the return jets and don’t dissipate, check the skimmer basket and pump basket for clogs. Air leaks in the suction lines can also pull air into the system, reducing circulation efficiency.
If the water is clear but smells strongly of chlorine, it’s likely chloramines—the result of chlorine reacting with contaminants. This is a sign that the pool needs shocking, not more chlorine. A proper shock treatment breaks down these combined chloramines, restoring water clarity and reducing eye irritation.
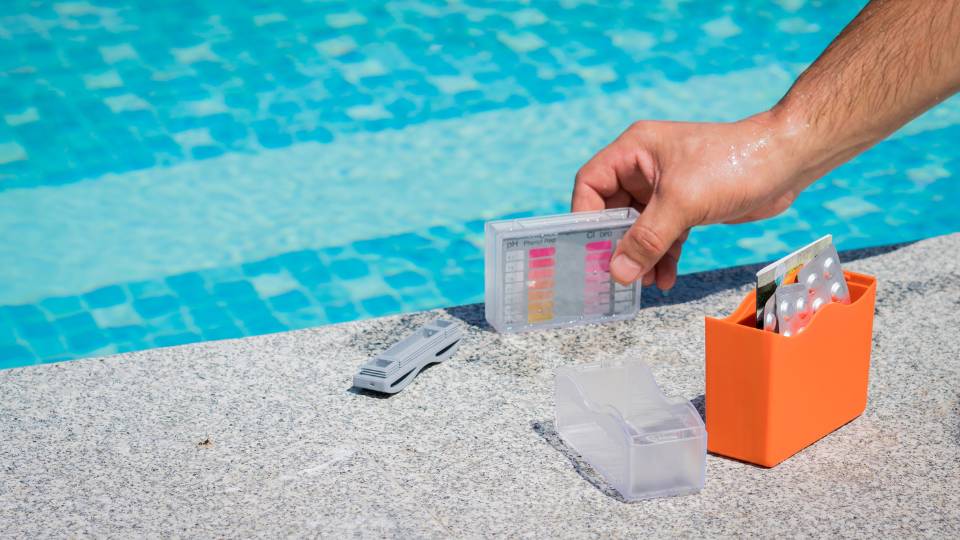
Test chemical balance and pH
Cloudy water, skin irritation, or a strong chlorine smell usually point to unbalanced chemistry. Before checking equipment or filters, verify that the water’s chemical profile sits within safe ranges. Proper balance prevents corrosion, scaling, and bacterial growth.
1. Measure pH and Total Alkalinity
Start with pH, which dictates how well other chemicals work. The ideal range is 7.2 to 7.8. If pH is too high, chlorine becomes less effective. If it’s too low, the water can damage pool surfaces and irritate swimmers.
Total alkalinity acts as a buffer for pH stability. Aim for 80 to 120 parts per million (ppm). Use a liquid test kit or high-quality test strips for accuracy. Digital meters drift quickly in pool environments and often give false readings.
2. Check Free Chlorine and Bromine
Free chlorine is the active sanitizer fighting bacteria and algae. For residential pools, maintain 1 to 3 ppm. If you use a saltwater generator, follow the manufacturer’s specific output settings.
Bromine is an alternative for hot tubs or warm pools where chlorine dissipates faster. Keep levels between 3 to 5 ppm. Test strips usually differentiate between combined chlorine (chloramines) and free chlorine. A strong "chlorine smell" actually indicates high chloramines, meaning you need to shock the pool, not add more sanitizer.
3. Evaluate Calcium Hardness and Cyanuric Acid
Calcium hardness prevents water from leaching calcium out of plaster surfaces or causing scale buildup. Target 200 to 400 ppm. Water that is too soft eats away at concrete; water that is too hard leaves crusty deposits on tiles and heaters.
Cyanuric acid (stabilizer) protects chlorine from UV breakdown in outdoor pools. Ideal levels are 30 to 50 ppm. Without it, sunlight destroys chlorine in hours. Too much stabilizer locks up the chlorine, making it useless even if test strips show high numbers. This is known as chlorine lock.
| Parameter | Ideal Range | Too High | Too Low |
|---|---|---|---|
| pH | 7.2 - 7.8 | Cloudy water, scaling | Corrosion, irritation |
| Free Chlorine | 1 - 3 ppm | Skin irritation | Algae growth, bacteria |
| Total Alkalinity | 80 - 120 ppm | pH drifts high, cloudy | pH drifts low, etching |
| Calcium Hardness | 200 - 400 ppm | Scale deposits, cloudy | Plaster etching, corrosion |
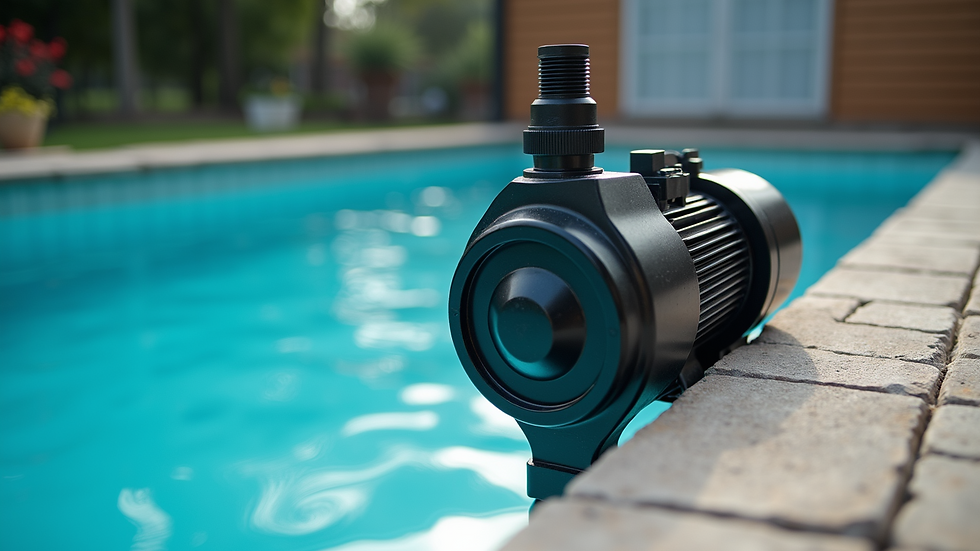
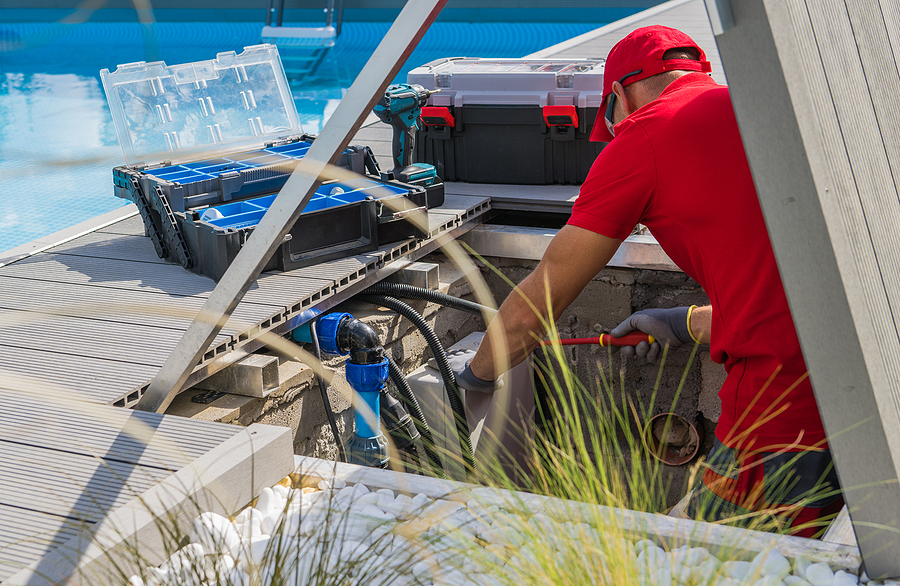
Inspect pumps and filtration
The pump and filter are the mechanical heart of your pool. When they falter, the water turns cloudy, chemicals stop working, and algae takes hold. You don't need a degree in engineering to spot the early warning signs. Start by listening to the system. A healthy pump hums with a steady, low-frequency vibration. If you hear loud grinding, screeching, or a sudden change in pitch, the impeller or bearings are likely failing.
Next, look at the pressure gauge on the filter tank. This dial is your primary health indicator. A reading that is 8–10 PSI higher than your clean, open-pump baseline means the filter is clogged with debris and needs backwashing or cleaning. Conversely, if the pressure is lower than normal, you likely have a suction-side leak or a blocked skimmer basket restricting water flow.
Check the pump basket and strainer
Turn off the power at the breaker before opening any compartments. Unscrew the pump lid and remove the strainer basket. Look for a thick mat of leaves, hair, or debris that isn't visible from the outside. A clogged basket forces the pump to work harder, leading to overheating and premature seal failure. Rinse the basket with a garden hose and ensure the rubber gasket is clean and seated properly before closing the lid.
Inspect the filter pressure and valves
Verify that all multiport valves are set to the correct position for the current operation, such as "Filter" or "Recirculate." Misaligned valves can bypass the filter entirely, sending unfiltered water back into the pool. Check for leaks around the valve unions and the filter tank seams. If you see water spraying or dripping, tighten the connections or replace the worn O-rings.
Examine the motor and seals
Look at the area where the motor meets the pump housing. A steady drip or a wet patch indicates a failed mechanical seal. While a small amount of moisture can be normal, a continuous stream will destroy the motor bearings. Also, check the pump impeller for cracks or debris wrapped around the shaft. If the impeller is damaged, the pump will lose prime and fail to move water effectively.
Test the safety and electrical components
Ensure the pump is grounded and that the GFCI (Ground Fault Circuit Interrupter) trips correctly when tested. A faulty GFCI is a serious shock hazard. Check the electrical conduit for cracks or exposure to sunlight, which can degrade the insulation over time. If the pump fails to start, listen for a hum; if it hums but doesn't spin, the capacitor may be dead.
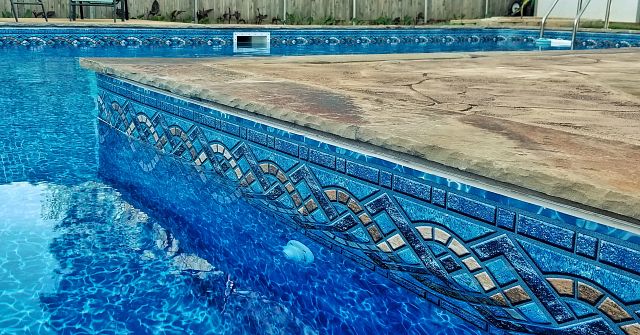
Check deck and coping integrity
The area surrounding your pool takes a beating from sun, water, and heavy foot traffic. Cracks in the concrete or loose coping stones are more than cosmetic issues; they are entry points for water to seep into the sub-base, leading to heaving, sinking, or structural failure. A compromised perimeter also creates tripping hazards and can damage the pool shell itself if water pressure builds up underneath.
Start by walking the entire perimeter with a flashlight. Look for visible cracks in the concrete deck, especially near the pool edge. Check if any coping stones (the capstones on the pool wall) are loose, tilted, or missing. Gently press on them; they should feel solid. If you hear a hollow sound or see movement, the mortar or adhesive underneath has likely failed.
Use a screwdriver or a coin to probe any visible cracks. If the tool sinks in easily, the crack is open and needs sealing. Small hairline cracks can often be filled with a flexible pool-grade caulk, but wider gaps may require professional repair to prevent water infiltration into the sub-base.
Press down on each coping stone. If any feel loose or shift under pressure, the bond has broken. Loose stones can become projectiles if kicked or cause trips. Re-bedding these stones with proper mortar is essential to restore safety and structural integrity to the pool edge.
Water should slope away from the pool, not toward it. Pour a bucket of water near the edge and watch where it goes. If water pools against the pool wall or flows into the skimmer, the deck slope is incorrect. This can lead to constant moisture under the coping, accelerating deterioration and creating slippery surfaces.
Addressing these issues early prevents costly structural repairs later. If you find significant heaving, large cracks, or multiple loose coping stones, consult a professional pool repair service. Ignoring these signs can lead to major damage to the pool shell and surrounding landscape.
Review safety equipment and barriers
A pool is a hazard until proven otherwise. Before you consider the water clear, walk the perimeter and verify that every barrier and safety device is intact and compliant. Missing or broken components turn a backyard into a liability.
Verify drain covers
Entanglement and suction entrapment are silent killers. Check that all drain covers are ASTM F1707 compliant, securely fastened, and free of cracks. If a cover is loose or damaged, the pool must remain closed until replaced. Never operate a pump with a missing or broken drain cover.
Inspect fencing and gates
The fence is your first line of defense. Ensure the barrier is at least four feet high with no gaps wider than four inches. Self-closing and self-latching gates must open outward, away from the pool, and the latch must be out of reach of small children. Test the gate mechanism; if it doesn’t latch automatically, it is not safe.
Check rescue equipment
A reaching pole and a life ring with a throwing rope should be mounted visibly near the pool edge. Verify that the rope is not frayed and the ring is not deflated. These items are useless if they are buried under lounge chairs or stored in a locked shed. Keep them accessible at all times.
Test alarms and covers
If your pool has an alarm, test it by lifting a gate or dropping a weight into the water. The alarm must sound immediately. For automatic safety covers, check the tension and locking mechanism. A cover that sags or doesn’t lock fully can trap a child or pet underneath, creating a drowning risk rather than preventing one.
Inspect first aid supplies
A fully stocked first aid kit should be located near the pool area but away from direct water spray. Check that it contains bandages, antiseptic wipes, and emergency contact numbers. Replace expired items regularly. In an emergency, every second counts, and missing supplies can delay critical care.
Finalize your swimming pool inspection
A swimming pool inspection checklist turns a scattered visual check into a repeatable system. You can print or download this list to track conditions over time, spot small leaks before they become big repairs, and verify that equipment meets safety standards.
-
Check vinyl liner for tears, wrinkles, or fading
-
Inspect pump, filter, and heater for leaks or unusual noise
-
Test water balance: pH, alkalinity, and sanitizer levels
-
Verify safety features: covers, alarms, and fence latches
-
Document all findings with photos and dates
Common pool inspection mistakes
Homeowners often rush through a pool inspection, missing subtle signs of trouble that become expensive repairs later. The most frequent error is treating the water chemistry check as a mere formality. If the pH is off or chlorine levels are inconsistent, it masks underlying issues with the plaster, grout, or equipment. A balanced pool is a healthy pool; ignoring this basic symptom can lead to corrosion, scaling, or algae blooms that damage the shell.
Another common oversight is skipping the visual inspection of the pool shell and deck. Cracks in the plaster or gaps in the coping might seem cosmetic, but they often indicate structural movement or settling. Homeowners should walk the entire perimeter, looking for hairline fractures or shifting tiles. These small defects allow water to seep into the ground beneath the pool, causing erosion and potential collapse.
Equipment rooms are frequently overlooked during inspections. The pump, filter, and heater are the heart of the pool, and their condition dictates long-term maintenance costs. Look for signs of wear on belts, leaks around valves, or unusual noises when the system runs. A well-maintained equipment room extends the life of your investment and prevents sudden breakdowns during peak season.
Finally, many homeowners forget to test the safety features. Skimmer baskets, drain covers, and emergency shut-off switches must be functional. A missing or damaged drain cover is a serious safety hazard that can lead to entrapment. Ensuring these components are in good repair is non-negotiable for any responsible pool owner.
Frequently asked: what to check next
How much does a professional pool inspection cost?
A thorough professional inspection typically runs between $300 and $500, depending on the pool's size and complexity. This fee covers a detailed examination of the structure, mechanical systems, and safety features. While it adds to closing costs, the inspection reveals hidden defects that can cost thousands to repair later.
What happens if a pool inspection fails?
A "failed" inspection means the pool has significant issues that need addressing before closing. You can negotiate with the seller to lower the price, pay for repairs, or walk away from the deal. Common failures include cracked shells, failing pumps, or missing safety barriers like fencing and alarms.
Can I inspect the pool myself before hiring a pro?
Yes, you can perform a preliminary visual check. Look for obvious cracks in the plaster, debris in the skimmer baskets, and proper water levels. However, DIY checks cannot detect structural integrity issues or internal mechanical failures. Always hire a certified inspector for the final assessment to ensure safety and compliance.
No comments yet. Be the first to share your thoughts!